Easy Hand Sewing Sampler For Busy Homeschoolers Part 2
Not only do I have an easy free printable hand sewing sampler for homeschoolers that will give your children great hand sewing practice of the basic 5 stitches, but I also have DIY’s for each stitch, for threading, and knotting, plus I guide you through sewing the sampler!
I also share 4 tips to help you through the sewing lessons as well as a brief history of samplers with links to photo examples your family will love to see!
Don’t worry about planning craft lessons! I have done that for you!
Let’s get started!
Last time I showed you how to sew the house section of this darling sampler. I also gave a couple of tips for including younger siblings during your craft lessons. The first half was getting to long, so I broke it up into two parts.
If you want to go back to part one click here.
Keep reading to find out more on how I help you solve your handicraft lesson planning problem using the old fashioned sampler as a huge help!
Brief Sampler History
Just for fun I want to give you a very brief history of samplers.
The earliest known American sampler was way back at the Plymouth colony in 1645. But in other countries samplers have been around for hundreds of years longer than that. Samplers go way back to the renaissance and possibly further! Just think a child that lived during the renaissance fair made a sampler similar to what your children make today. It boggles the mind doesn’t it?
Embroidery, cross stitching, or hand sewing skills were used to show off the sewers knowledge. Samplers could be for learning letters, mending methods, religious verses, and geography lessons among many other things. I just love all of it but especially the geography lessons because you would definitely know your geography if you took the time to sew it!
I have loved looking at samplers for years. Here is a website that has many very old examples. And here is another one website just for fun.
I made one as a child and have always been fascinated by them. It’s an old fashioned skill that has largely been forgotten which is such a shame. It really is a fabulous way to learn these sewing skills, while having a pretty display to help you remember the stitches and have a lovely piece of artwork to boot!
If you would like to learn how to make an embroidery sampler I have free lessons for this as well. Click here for the free embroidery lessons.
When we participate in these old fashioned skills we are creating a connection to the past that is real and tangible, all the while giving your children useful skills they can use for the rest of their lives. What a gift it is to bring this history alive to our children!
DIY Hand Sewing Sampler Materials
Just before we start the DIY hand sewing sampler, let’s go over the materials you need to accomplish it.
- Fabric scissors
- Needle
- Green, brown, and blue thread, or whatever colors you may already have
- Embroidery hoop size 14″ diameter
- My free PDF sampler pattern
Learn The Five Basic Hand Sewing Stitches
If you are new to this hand sewing don’t worry I have got you covered! I have a tutorial for each one. Click on the links below to learn all the stitches you need for hand sewing. Each one is listed in order.
- Running stitch DIY as well as how to thread and knot.
- Back stitch DIY
- Running back stitch DIY
- Blanket stitch DIY
- Whip stitch DIY
Tips For Hand Sewing Sampler For Homeschoolers
Tip # 1
I have four easy tips for you so that you can sew your sampler with greater ease.
The first one is making the end knot strong while not having the knot be seen from the front.
How it is done.
When you are underneath your work, wrap the thread around the needle 4 or so times. Stick the needle behind your last stitch and pull through. This hides your knot. You can repeat one more time but I just knot once.

Tip # 2
The second tip I have for you is how to untwist your thread. As you sew your thread will naturally twist. It will become to much from time to time so you will need to untwist it.
How it is done.
To do this simply move your work upside down and it will start untwisting itself. Gently pull your finger on the thread closest to the fabric down to your needle, to help untwist even more.
Tip # 3
This sampler is not meant to be finished in one or two handicraft lessons. Depending on your child, it can take a good month or more. The important thing is that progress is made each sewing time, not that it has to be done by a certain date.
Tip # 4
While they sew is a great time for read a louds. Sewing can absolutely be a great help for your children to hold their concentration as they listen. It was for me as a child. In fact I do still listen better when my hands are busy!
My husband has a few fairy tale audio story collection that you can listen to for free if you wish. Find the stories here. It is also in podcast form which can be found wherever you listen to podcasts under the title “Tales From Long Ago”
On to the hand sewing sampler DIY!
#1 Easy Hand Sewing Sampler For Homeschoolers
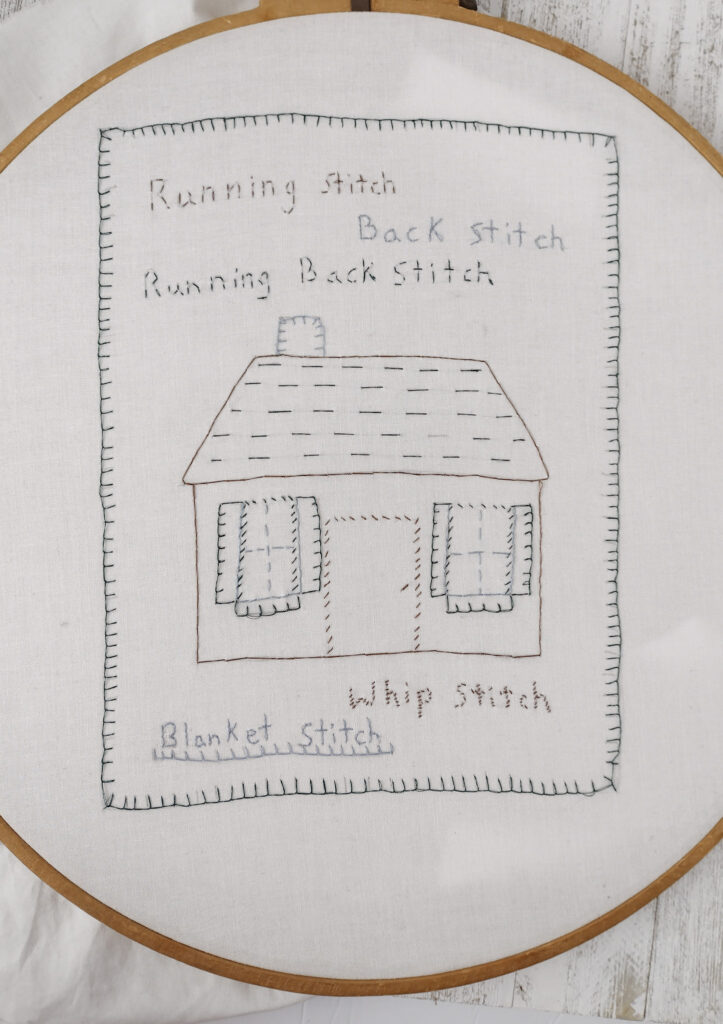
Last time we finished the house now we are going to finish our sampler up with the words and the border.
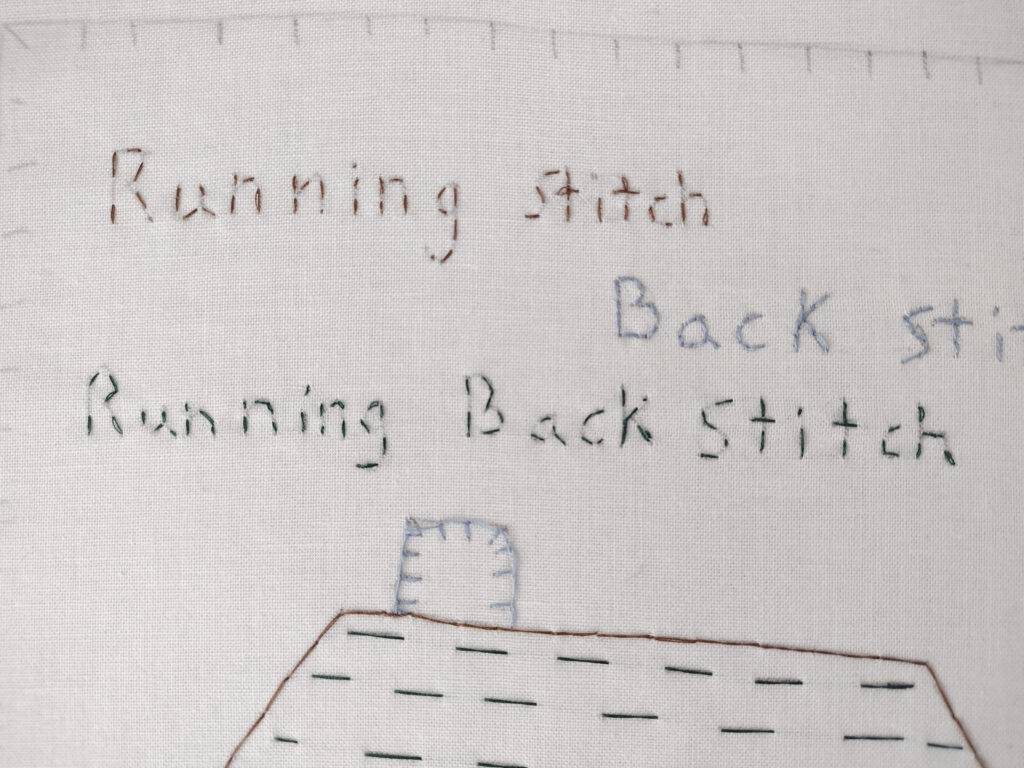
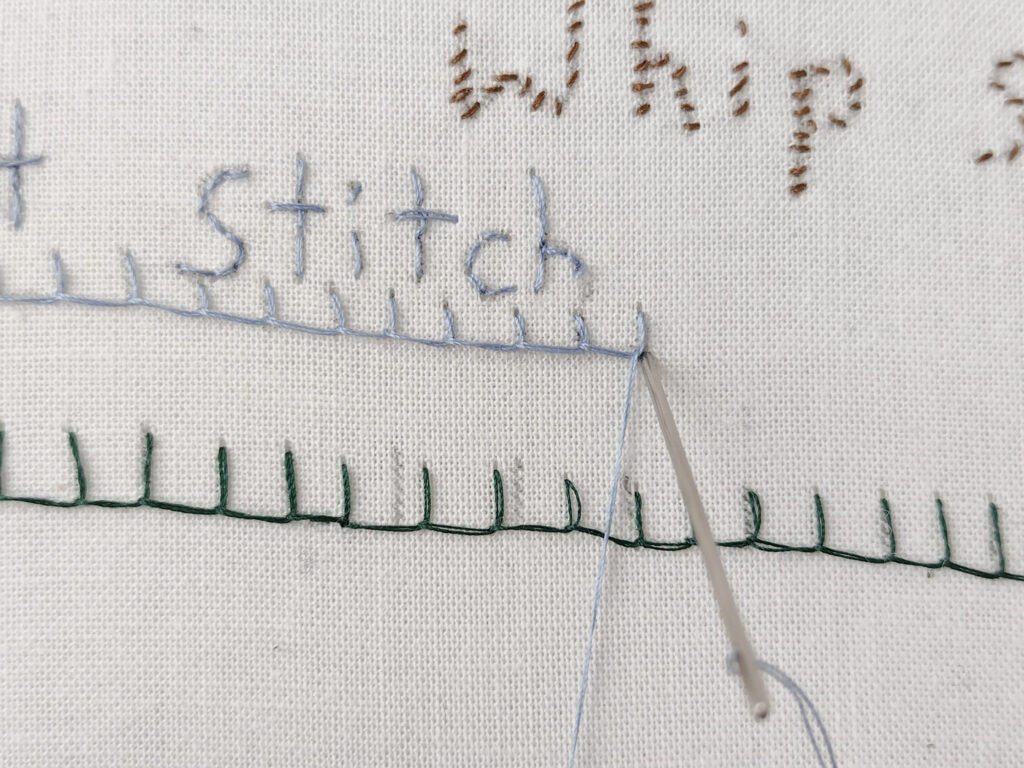
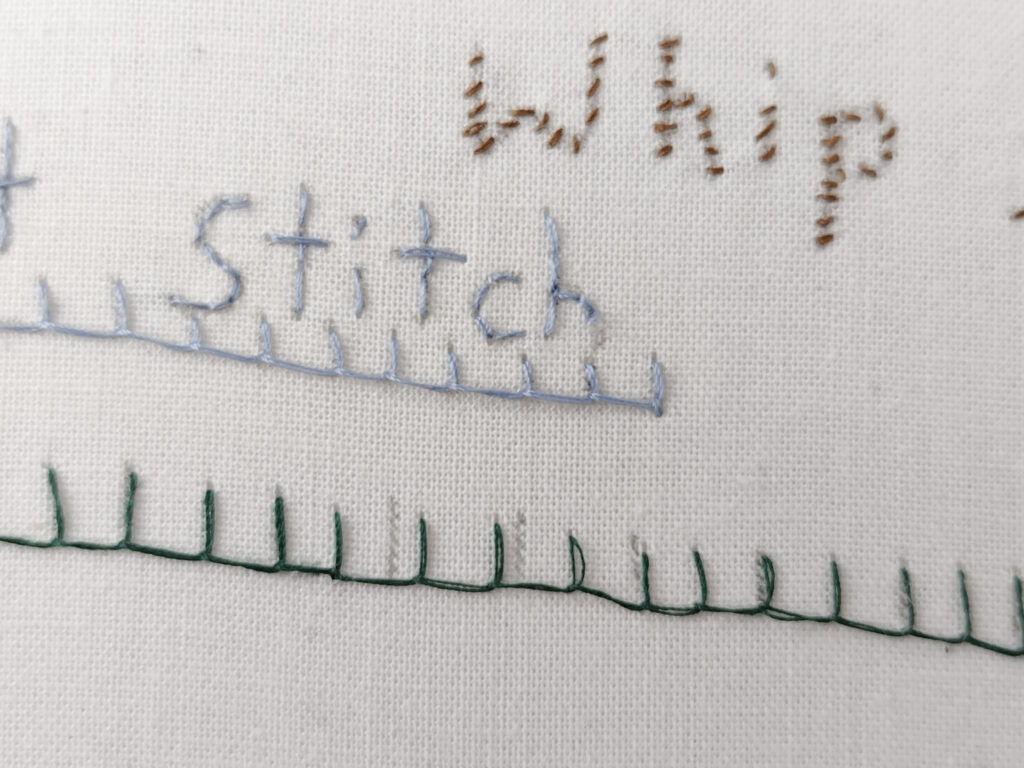
Each name of the stitch is sewn using the stitch itself.
If that was as clear as mud, here is what I mean.
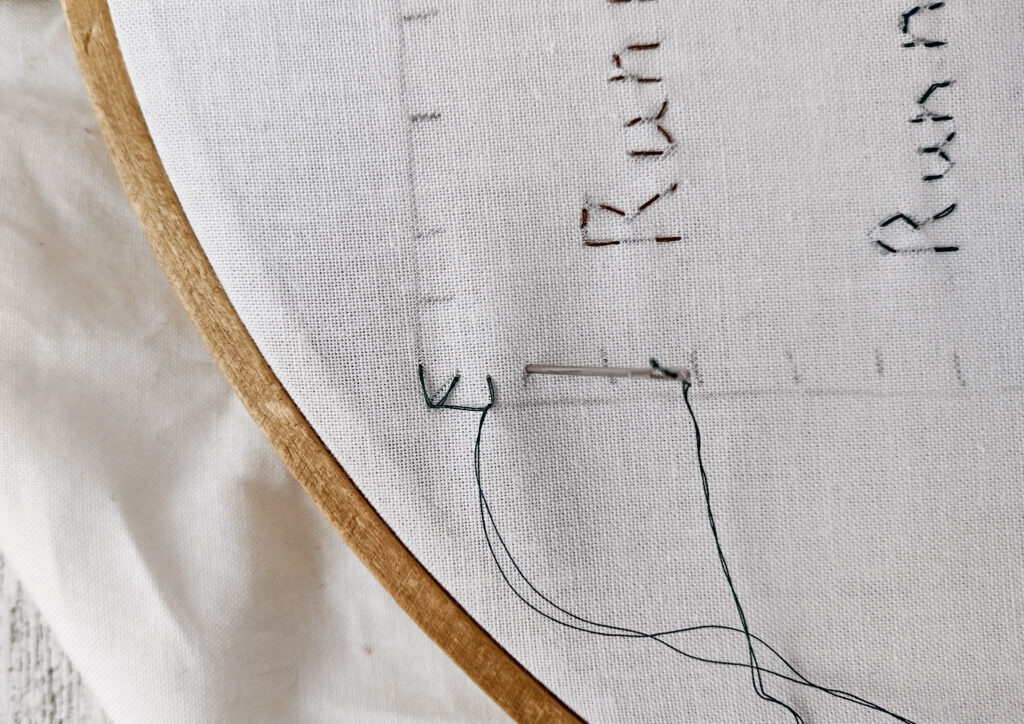
- The words “running stitch” is sewn using the running stitch.
- The words “back stitch” is sewn using the back stitch.
- The words “running back stitch” is sewn using the running back stitch.
- The words “whip stitch” is sewn, you guessed it, using the whip stitch!
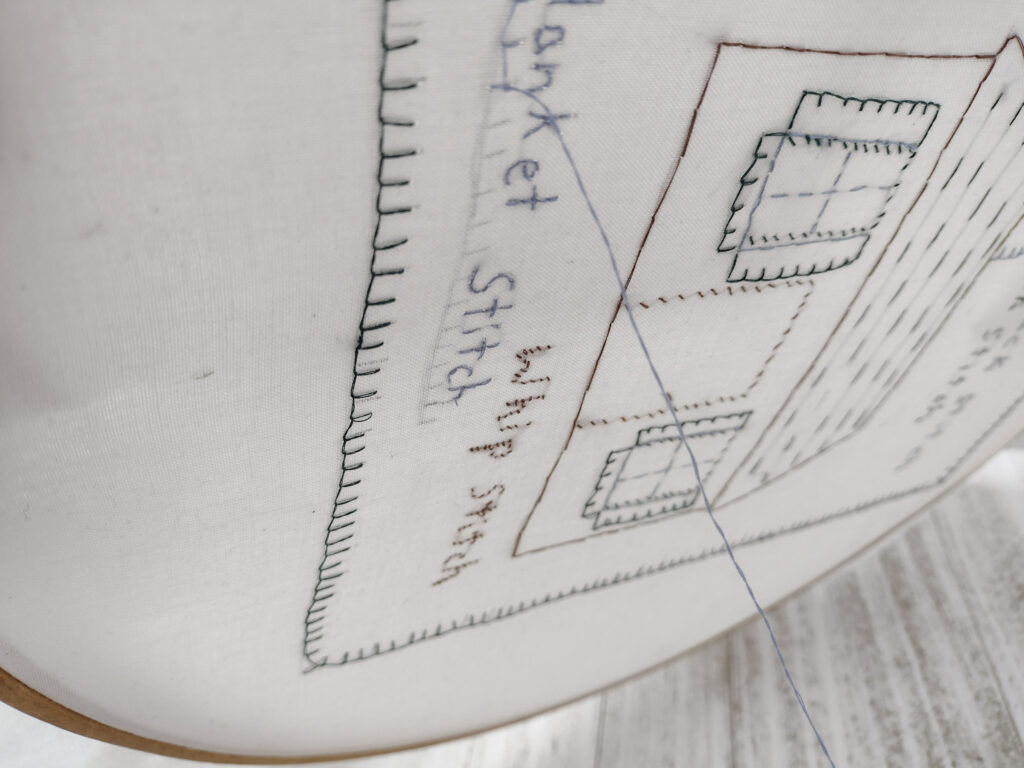
The only exception is with the blanket stitch. I sewed the words, “blanket stitch” using the back stitch, with the actually blanket stitch underneath.
To end your blanket stitch, stick the needle close to your last stitch, and then pull through to the back of your work. Knot, as always, in the back.

#2 Easy Hand Sewing Sampler For Homeschoolers
The border is the blanket stitch all the way around and that’s it.
Start from any corner. Sew all the way around.
All done! Fun wasn’t it?
Congratulations You Did It!
Congratulations! Your children have stepped into the past for just a little bit all the while learning a skill that can help them make so many things such as, curtains, aprons, shirts, pants, dresses, caps, costumes, pillow cases, baby clothes, table clothes, the list can go on and on.
Sewing this sampler gets your children ready to sew so many other sewing projects as mentioned above, but it also helps a great deal with planning your Charlotte Mason handicraft lessons! Sign up for my emails here and you will never need to plan another craft lesson again!